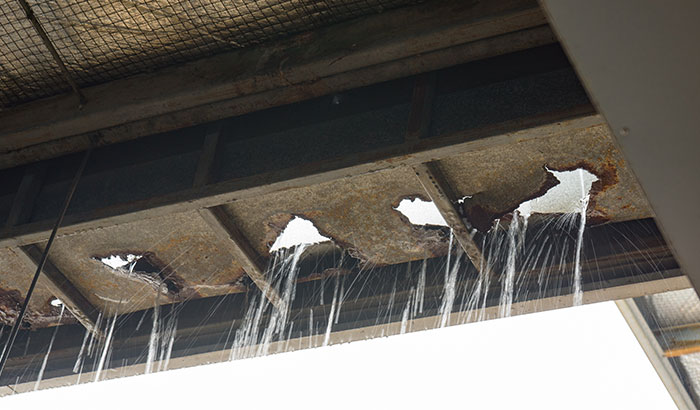
Roof leaks are a common problem that can cause severe damage to your home if left unaddressed. They can occur for various reasons, including poor installation, wear and tear, and extreme weather conditions. When you notice a leak, taking immediate action is essential to prevent further damage.
In this article, we’ll discuss 30 steps to take if your roof leaks:
Step 1: Identify the Source of the Leak
The first step in addressing a leaking roof is to identify the source of the leak. Look for water stains on your ceiling or walls, and follow the trail to the source of the leak.
Step 2: Safely Access the Roof
Before attempting to repair the leak, it’s important to access the roof safely. Use a sturdy ladder and wear appropriate safety gear, such as non-slip shoes and a safety harness, to prevent falls and injuries.
Step 3: Evaluate the Extent of the Damage
Once on the roof, evaluate the extent of the damage. Look for areas of missing or damaged shingles, cracked or rusted flashing, and damaged or worn seals around vents or chimneys. Next, assess the overall condition of the roof to determine whether repairs or replacement may be necessary.
Step 4: Secure Loose Shingles
If you notice any loose or missing shingles, secure them using roofing cement or nails. First, apply a small amount of roofing cement to the underside of the shingle, then press it firmly into place. Alternatively, use roofing nails to secure the shingle to the roof deck.
Step 5: Replace Damaged Shingles
If any shingles are severely damaged or missing, they must be replaced. Remove the damaged shingles using a pry bar, then install new shingles in their place. Use roofing cement to seal the shingles and prevent water from penetrating the roof deck.
Step 6: Repair Flashing
Flashing is the metal or plastic material used to seal joints and prevent water from penetrating the roof. If your flashing is cracked or rusted, it may need to be repaired or replaced. Remove the old flashing using a pry bar, then install the new flashing. Use roofing cement to seal the edges of the flashing and prevent water from penetrating the roof.
Step 7: Seal Vents and Chimneys
Vents and chimneys can be a common source of leaks if the seals around them become damaged or worn. Remove any old seals using a scraper or putty knife, then apply new sealant around the edges of the vent or chimney. Use roofing cement or silicone sealant to ensure a watertight seal.
Step 8: Apply Roofing Cement
Roofing cement is a waterproof sealant that can repair cracks and gaps in your roof. Apply a small amount of roofing cement to areas where water penetrates the roof, such as around vents or chimneys, and smooth it out with a putty knife.
Step 9: Install a Temporary Tarp
If the leak is severe and cannot be immediately repaired, install a temporary tarp over the affected area to prevent water from entering your home. Use a heavy-duty tarp and secure it using rope or bungee cords.
Step 10: Improve Ventilation
Poor ventilation in your attic can lead to moisture buildup and roof damage, which can cause leaks. Check your attic vents to ensure adequate airflow and reduce moisture buildup. You may need a professional to install additional vents or make other ventilation improvements.
Step 11: Install a Leak Barrier
A leak barrier is a protective layer installed underneath your roofing material to prevent water from penetrating your roof deck. If you live in an area with heavy rainfall or other severe weather conditions, installing a leak barrier can provide an extra layer of protection against leaks. Contact a roofing professional to learn more about this option.
Step 12: Replace the Roof
If your roof is severely damaged or has reached the end of its lifespan, replacement may be necessary. Contact a roofing professional to assess the condition of your roof and recommend the best course of action. A full roof replacement can be a major investment, but it will provide long-term protection for your home.
Step 13: Check Your Homeowner’s Insurance
If a storm or other natural disaster has damaged your roof, your homeowner’s insurance may cover the cost of repairs or replacement. First, check your policy to see what types of damage are covered and your deductible. Then, contact your insurance company to file a claim and repair or replace your roof.
Step 14: Hire a Professional
Roof repairs can be dangerous and complicated, especially if you are not experienced in roofing. It’s always best to hire a professional to assess and repair your roof to ensure the job is done safely and correctly. Look for a licensed and insured roofing contractor with a good reputation in your community.
Step 15: Get Multiple Estimates
Before hiring a roofing contractor, get multiple estimates from different companies. This will give you a better idea of the average cost of repairs or replacements in your area and help you make an informed decision. Be sure to compare the estimates carefully and ask any questions you may have before making a final decision.
Step 16: Check for Licensing and Insurance
When hiring a roofing contractor, make sure they are licensed and insured. This will protect you in case of any accidents or damage during the repair or replacement process. Ask for proof of licensing and insurance before hiring any contractor.
Step 17: Review the Contract
Before work begins on your roof, review the contract carefully. Ensure it includes all the job details, such as the scope of work, materials to be used, and estimated completion date. Ask any questions you may have before signing the contract.
Step 18: Prepare Your Home
Before the roofing contractor arrives, prepare your home for the repair or replacement process. Move any outdoor furniture or decorations out of the way and clear a path for the workers to access the roof. Cover any fragile items inside your home to protect them from debris if necessary.
Step 19: Stay Informed
Stay informed about the job’s progress throughout the repair or replacement process. Ask the contractor for updates, and be sure to communicate any concerns you may have. This will help ensure that the job is completed to your satisfaction.
Step 20: Inspect the Finished Work
Once the job is complete, inspect the work carefully to ensure it has been done to your satisfaction. Check for any signs of leaks or damage and ask the contractor to address any issues before making the final payment. It’s always a good idea to take before and after photos to document the work done.
Step 21: Maintain Your Roof
Regular maintenance is key to preventing future roof leaks. Make sure to schedule annual inspections with a professional roofing contractor and address any minor repairs as soon as they are identified. Keep your roof debris-free and trim any overhanging tree branches to prevent damage.
Step 22: Consider a Roof Coating
A roof coating can help extend the life of your roof and prevent leaks. Coatings are typically applied to flat or low-slope roofs and can help improve energy efficiency and reflectivity. Talk to a professional roofing contractor to determine if a roof coating is a good option for your home.
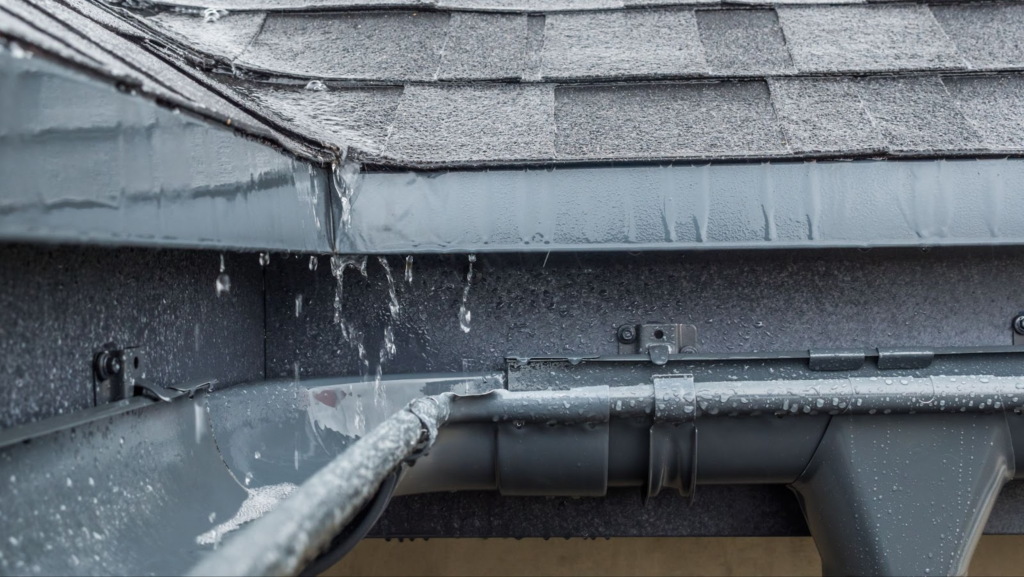
Step 23: Install Gutters and Downspouts
Proper water drainage is essential to preventing roof leaks. Ensure your home has gutters and downspouts installed to direct water away from your roof and foundation. Keep gutters free of debris, and make sure they are securely attached to your home.
Step 24: Add Insulation
Proper insulation can help prevent heat loss and reduce the risk of ice dams on your roof. Ensure your attic is adequately insulated to help prevent roof leaks caused by melting snow and ice. A professional contractor can assess your insulation needs and recommend the best course of action.
Step 25: Install Proper Ventilation
Proper ventilation is essential to preventing moisture buildup in your attic, which can lead to roof leaks and other issues. Ensure your attic has adequate ventilation, including soffit vents, ridge vents, and gable vents. A professional roofing contractor can assess your ventilation needs and recommend the best course of action.

Step 26: Monitor Your Roof During Extreme Weather
During extreme weather, such as heavy rain, snow, or wind, monitor your roof for signs of damage or leaks. If you notice any issues, contact a professional roofing contractor to assess the damage and recommend the best course of action.
Step 27: Address Interior Water Stains
If you notice water stains on your ceilings or walls, you likely have a roof leak. Address these issues as soon as possible to prevent further damage to your home. Contact a professional roofing contractor to assess the source of the leak and recommend the best course of action.
Step 28: Consider a Home Energy Audit
A home energy audit can help identify areas of your home that may contribute to roof leaks, such as air leaks or inadequate insulation. Contact a professional energy auditor to assess your home’s energy efficiency and recommend the best action.
Step 29: Keep Records of Repairs and Maintenance
Keeping records of all roof repairs and maintenance can be helpful in the event of future leaks or damage. Also, keep copies of all contracts, invoices, and warranties related to your roof. This can help ensure you have a clear record of all work done and any warranties still in effect.
Step 30: Be Proactive
The best way to prevent roof leaks is to be proactive about maintenance and repairs. Regularly inspect your roof for signs of damage or wear and address any issues as soon as possible. This can help prevent minor issues from becoming major problems and extend the life of your roof.
Dealing with a leaking roof can be a stressful and time-consuming process, but by following these steps, you can identify the source of the leak, make any necessary repairs, and take steps to prevent future leaks. Remember to stay calm, ensure your safety, and seek professional help to provide the best possible outcome for your home and your family.
Leaky Roof? Call Utah Disaster Clean Up for Water Damage
If a leaky roof is causing damage in your home or business, it’s important to remediate the damage as quickly as possible. The sooner the water damage is taken care of, the better, with the first 24 hours being the most critical.
Utah Disaster Clean Up has over 20 years of experience remediating water, mold, fire, and smoke damage. We offer fast, friendly service and have 24/7 availability. No matter when your water damage shows up, we’ll fix it and cover it with our one-year guarantee.
Contact us today via our website or at (435) 512-1584. Let Utah Disaster Clean Up restore your home today.
