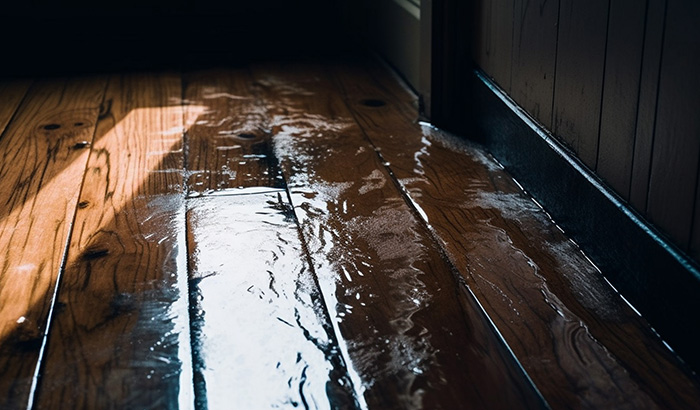
Water damage in hardwood floors is a daunting challenge for any homeowner. The beauty and durability of hardwood floors make them a cherished feature in many homes, but when water makes its unwelcome presence known, it quickly mars this beauty.
Water damage from floods, leaks, or spills often leads to warping, discoloration, and even structural damage if you don’t address it promptly.
In this guide, we’ll walk you through five essential considerations for effectively cleaning and repairing your water-damaged hardwood floors.
Assessing the extent of water damage
When water invades your hardwood floors, the first step is to assess the severity of the damage. Hardwood floors are particularly susceptible to water damage, and the signs can be both visible and hidden.
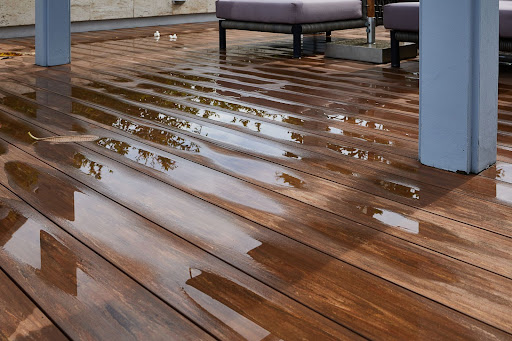
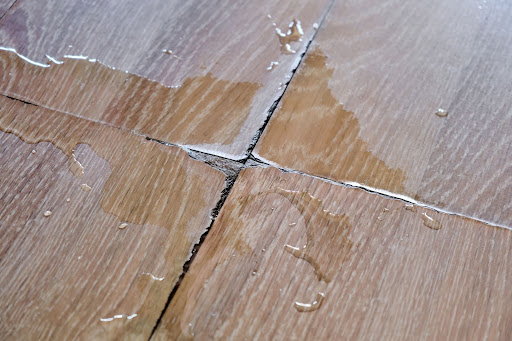
Warping is a common indicator of water damage in hardwood floors. This is when the boards either cup upwards or downwards, creating an uneven surface. Discoloration is another telltale sign; water stains often leave dark spots or patches.
Swelling or buckling of the floorboards clearly indicates that they have absorbed excess moisture. In more severe cases, you might notice mold growth, which damages the floor and poses health risks.
However, not all damage is immediately apparent to the untrained eye. Water can seep into subflooring, leading to problems that are not visible on the surface. This hidden damage compromises the structural integrity of your floors and your home. That’s why a professional assessment is vital.
Remember, the sooner you assess the extent of the damage, the better your chances of a successful restoration. Delaying this assessment might lead to more extensive damage and costly repairs.
Immediate steps to minimize damage
Taking immediate action is crucial to minimize damage to your hardwood floors in the aftermath of water exposure.
Removing standing water
The first step is to remove any standing water as quickly as possible. Remove standing water using wet vacuums or pumps, which effectively extract water. It’s essential to be thorough during this process, as any remaining water might seep deeper into the floor and cause further damage.
For smaller spills or in areas where these tools aren’t accessible, use towels and mops to soak up the water. The key is to act swiftly and remove as much water as possible as quickly as you can.
Drying the area
Once the standing water is removed, the next step is to dry the area thoroughly. Industrial-grade fans and dehumidifiers are highly effective in this regard. They help circulate air and reduce moisture levels, which is vital for preventing the wood from swelling and warping.
Positioning these tools strategically is important to ensure optimal airflow and moisture removal. Remember, natural ventilation also plays a significant role; opening windows and doors aids in the drying process, weather permitting.
Preventing mold and mildew growth
Moisture is a breeding ground for mold and mildew. These fungi damage your floors and pose health risks.
To prevent their growth, it’s crucial to maintain a dry environment. Using dehumidifiers helps in keeping the humidity levels in check. Applying mold inhibitors to the floor provides an extra layer of protection.
However, if mold has already started to form, address it immediately. Professional mold remediation services are often necessary to ensure the mold is thoroughly removed and your home remains safe and healthy.
Cleaning and disinfecting your floors
After addressing the immediate concerns of water removal and drying, the next crucial step is properly cleaning and disinfecting your hardwood floors.
Choosing appropriate cleaning solutions
It’s essential to select suitable cleaning agents for water-damaged hardwood floors. Harsh chemicals can further damage the wood, so use mild, pH-neutral cleaners specifically designed for hardwood. These solutions effectively remove dirt and residues without harming the wood’s finish.
For areas with mold or mildew, use a gentle fungicide to address these issues without causing additional damage.
Step-by-step cleaning and disinfecting guide:
- Prepare the solution: Dilute the hardwood-friendly cleaner per the manufacturer’s instructions. For mold and mildew, prepare a separate solution with the recommended fungicide.
- Gentle cleaning: Using a soft mop or cloth, gently clean the surface of the hardwood floors. Avoid over-saturating the wood with the cleaning solution. The goal is to clean the surface without allowing excess moisture to seep into the wood.
- Disinfecting: Apply the disinfectant or fungicide solution using a spray bottle or a damp cloth. Ensure even coverage, particularly in areas where mold or mildew is present.
- Rinse and dry: Lightly rinse the floor with a damp mop using clean water after cleaning and disinfecting. Immediately follow up with a dry mop or cloth to remove residual moisture.
Tips to avoid further damage:
- Always test cleaning solutions on a small, inconspicuous area first.
- Do not use steam cleaners or overly wet mops, as excessive moisture will worsen the damage.
- Avoid abrasive tools or scrubbers that might scratch the wood’s surface.
- Ensure the room is well-ventilated during the cleaning process to aid in drying.
By following these steps, you’ll effectively clean and disinfect your water-damaged hardwood floors, helping to restore their natural beauty while maintaining the integrity of the wood. Remember, it’s always best to consult with professionals if you need clarification on any part of the process.
Repairing, restoring, or replacing hardwood floors
When it comes to water-damaged hardwood floors, the decision between repairing vs. replacing is often complex. It is helpful to know what goes into replacing or repairing hardwood floors.
When to repair vs. replace
The decision to repair or replace your hardwood floors largely depends on the extent of the damage. A professional service is usually able to address issues like minor warping, slight discolorations, and small areas of mold.
However, if the damage is extensive and affects the structural integrity of the flooring or the subfloor, replacement might be the more viable option. Factors such as the age of the floor, the extent of water exposure, and the presence of persistent mold contribute to this decision.
Hardwood floor repair techniques
For floors deemed repairable, techniques vary based on the type and extent of the damage. For minor warping, professionals will usually sand down the affected area and refinish it to match the rest of the floor. They can also replace or refinish any discolored planks. In cases of mold, mold remediation professionals treat or replace the affected sections.
Preventative measures for future protection
Prevention is just as important as restoration. Protecting your hardwood floors from future water damage preserves their beauty and saves you from potentially costly repairs. Here are some essential tips to keep your hardwood floors safe and in excellent condition for years to come.
Protecting hardwood floors from water damage
While you can’t always prevent your floor from getting wet, there are lots of ways to prevent water damage before you need to repair your hardwood floors.
First, always clean up spills immediately. The longer water sits on hardwood floors, the higher the risk of damage.
Well-installed floors are more resistant to damage. Ensure that your hardwood floors are properly installed with no gaps for water to seep through.
Extreme changes in humidity can cause wood to expand and contract, leading to damage. Maintain a stable indoor climate when possible.
Lastly, put mats and rugs in high-risk areas, such as near sinks, dishwashers, and doors. These absorb water and prevent it from reaching your hardwood floors. However, it’s important to ensure these mats fully dry out after they get wet so as not to grow mold. If these mats are always wet, you might have a leak to address.
Regular Maintenance
Regularly maintaining your floor extends its lifespan and increases its resilience to damage.
Start by keeping your floors clean and dry. Use a dry or slightly damp mop for cleaning and avoid excessive water.
You should also regularly check for signs of water damage or leaks, especially in areas prone to moisture.
Lastly, use cleaning products specifically designed for hardwood floors to avoid damaging the finish.
The Role of Sealants and Finishes:
Use a high-quality sealant to protect your hardwood floors. Sealants provide a barrier against moisture and spills.
You should regularly reapply sealants and finishes. Over time, the finish on hardwood floors wears down. Reapplying finish or sealant every few years significantly enhances your floor’s resistance to water damage.
Following these preventive measures significantly reduces the risk of water damage to your hardwood floors. Remember, regular maintenance and proactive protection are key to the longevity and beauty of your hardwood flooring.
Repair your hardwood floors with Utah Disaster Clean Up & Restoration
Dealing with water-damaged hardwood floors and hardwood floor repair requires a careful and informed approach. At Utah Disaster Clean Up & Restoration, we understand that navigating through the aftermath of water damage in hardwood floors is overwhelming, which is why we’re here to help.
With 20 years of experience, our team of experts has the knowledge, experience, and tools necessary to restore your hardwood floors to their original state, ensuring peace of mind and satisfaction.
If you’re facing the challenge of water-damaged hardwood floors, don’t hesitate to contact Utah Disaster Clean Up & Restoration. We’re here to provide you with the expert assistance and support you need during this crucial time. Let us help you bring your floors and home back to life.