Storm damage can be overwhelming for any homeowner. The first step towards recovery and restoration is a thorough and accurate damage assessment. This initial evaluation helps homeowners and restoration professionals understand the extent of the repairs needed, plays a vital role in insurance claims, and preserves the safety of the home’s occupants.
This guide will walk you through a step-by-step process for assessing storm damage and provide the necessary knowledge and tools to navigate this challenging time effectively.
Step 1: Check for safety
Before diving into the assessment of storm damage, homeowners should prioritize safety. The aftermath of a storm presents various hazards, and it’s important to be cautious. Taking these precautions helps you avoid potential hazards and ensure a safer environment for assessing and addressing storm damage to your home.
If you encounter significant damage or feel unsure about the safety of your home, seek assistance from restoration professionals who provide a more in-depth evaluation and necessary repairs.
Electrical safety
First and foremost, be wary of electrical hazards. If there’s any sign of damage to electrical wires or if you suspect water intrusion near electrical systems, it’s safest to turn off the main power supply. Avoid touching electrical equipment or switches with wet hands or when standing in water.
Structural integrity
Inspect your home for any visible structural damage from the outside before going in. Look for signs of wall cracks, roof damage, or foundation issues. If you suspect structural damage, it’s best to wait for a professional assessment before entering.
Fallen debris and broken glass
Be cautious of fallen objects, debris, and broken glass. Wear sturdy shoes and gloves when walking around or handling storm debris.
Gas leaks
The smell of gas or a hissing noise indicates a gas leak. Immediately leave the area and contact your gas company. Do not attempt to switch on or off any electrical appliances.
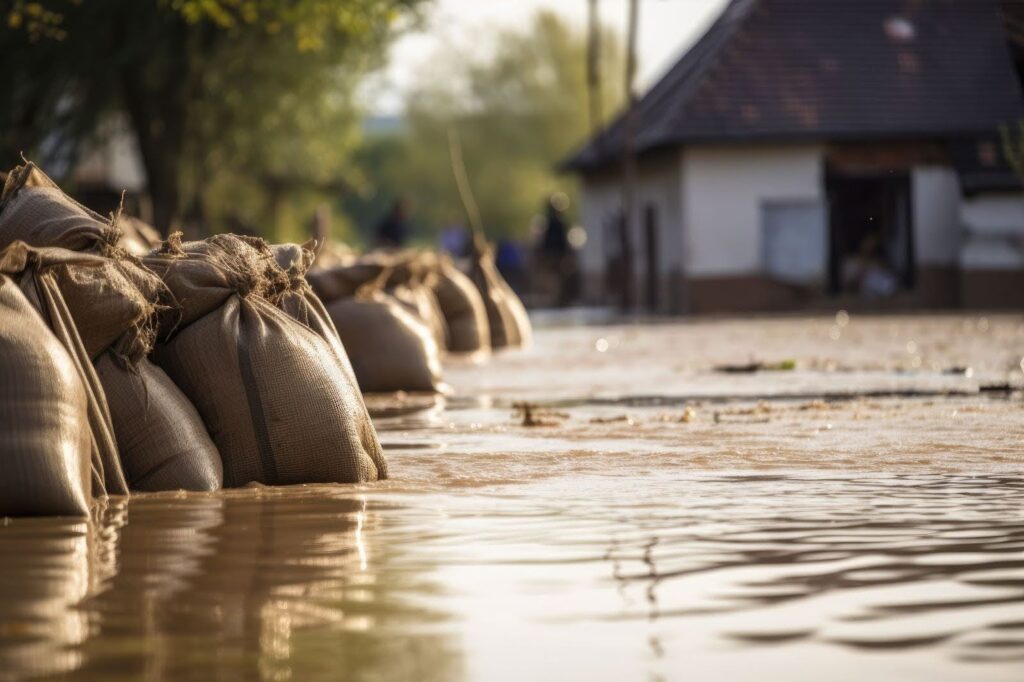
Flood water
Flood water can be contaminated or electrically charged. Avoid wading through standing water, especially in basements or lower levels.
Step 2: Externally inspect the property
After ensuring personal safety, the next step for homeowners is to conduct a thorough external assessment of their property. Conducting a comprehensive external assessment helps homeowners understand the extent of storm damage and leads to a smoother restoration process.
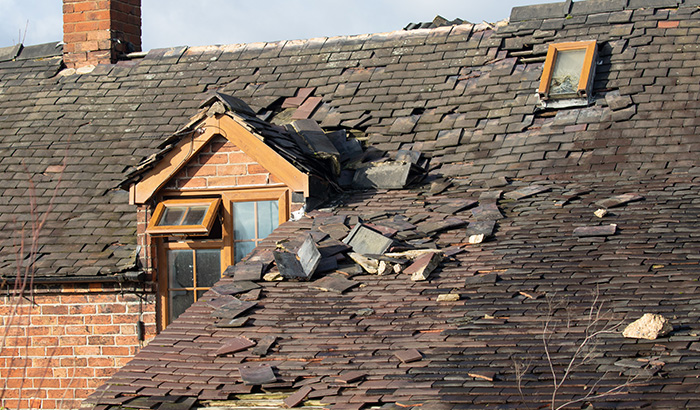
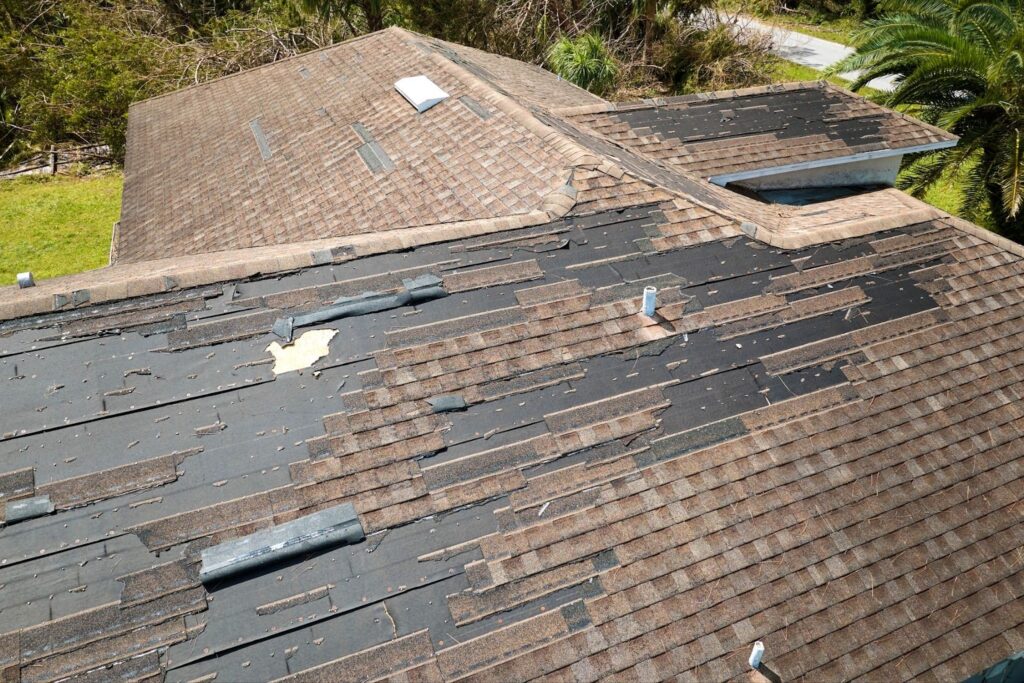
Roof inspection
Start by inspecting the roof, as it’s often the most affected area. Look for missing, damaged, or loose shingles and tiles. Check for any visible holes, cracks, or dents, common after hail storms or heavy winds. Don’t forget to inspect the gutters and downspouts for blockages or damage, as these lead to water issues later.
Wall examination
Examine the exterior walls for signs of damage. Look for cracks, chipping, or dents in the siding or stucco. Pay special attention to the areas around windows and doors, as these are vulnerable points where water can seep in.
Window and door check
Inspect all windows and doors for cracks, broken glass, or damaged frames. Ensure they open and close properly, as warping indicates structural issues. Check the seals and weather-stripping to ensure they haven’t been compromised.
Foundation assessment
Look for any new cracks or shifts in the foundation, as these can be signs of serious structural damage. Check also for water pooling around the foundation, as it creates future problems.
Inspecting drainage systems
Ensure that the storm hasn’t clogged your drainage systems. Blocked drains cause water to pool and seep into the foundation or basement, leading to further issues.
Landscaping and surrounding area
Finally, assess the landscaping and surrounding area. Look for fallen trees or branches that could pose a risk to your property. Ensure that the grading of your yard hasn’t been altered, as improper grading directs water toward your home.
Step 3: Internally inspect the property
Once the external assessment is complete and it’s safe to enter, homeowners should begin a thorough internal inspection. This step is crucial in identifying any water damage, electrical issues, and concerns regarding structural integrity that may not be visible from the outside.
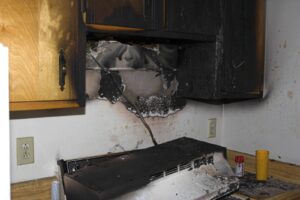
Water damage inspection
Start by checking for signs of water intrusion. Look for water stains on ceilings and walls, as these indicate roof leaks or other plumbing problems. Inspect carpets, flooring, and baseboards for dampness or swelling. In areas like bathrooms and kitchens, check around appliances and fixtures for any leaks.
Remember, water damage isn’t always immediate, so be vigilant for signs of mold or mildew, which indicate hidden moisture.
Electrical system check
Exercise extreme caution when inspecting your electrical system. Look for any signs of water near electrical outlets, fuse boxes, or appliances. If you suspect water has come into contact with your electrical system, do not use the electricity until a professional has deemed it safe.
Structural integrity
Pay close attention to the structural elements of your home. Check for cracks or shifts in walls and ceilings. Doors and windows that are difficult to open or close also indicate potential structural issues.
Basements and attics
These areas are often the first to show signs of storm damage. In basements, look for water pooling or seepage — these weaken foundations over time. In attics, inspect for leaks, insulation damage, and the roof’s structural damage from the inside. Be mindful of any musty odors or visible mold, as these indicate moisture problems.
Step 4: Document the damage
For homeowners, effectively documenting storm damage is a critical step, especially when it comes to insurance claims. Proper documentation ensures that you have a detailed record of the damage, which is essential for a smooth claims process and adequate compensation. As a homeowner, taking the time to document the damage thoroughly will positively impact the recovery and restoration of your property.
Take comprehensive photographs
Start by taking clear, detailed photographs of all damaged areas. Capture wide shots to show the overall extent of the damage and close-ups to highlight specific issues, such as water stains, broken windows, or damaged roofs. Remember to photograph areas that might not seem damaged at first glance, as these photos could reveal hidden problems upon closer inspection.
Create a detailed inventory
Alongside photographs, compile a comprehensive inventory of all damaged property. Include descriptions of each item, its condition before the storm, and its estimated value. For appliances or electronics, note the make, model, and serial number. This level of detail is invaluable for insurance claims.
Record dates and times
Document the date and time of the storm, as well as the dates and times when you took the photographs and made the inventory. This information adds credibility to your documentation.
Keep receipts and estimates
Keep all receipts and estimates if you need to make immediate repairs or purchase replacements for essential items. These will be important for reimbursement from your insurance company.
Backup your documentation
Store your photographs, inventory, and related documents both physically and digitally. Use cloud storage or external drives so you have backups in case of further damage or loss.
Step 5: Get a professional assessment
After a storm, there comes a point when homeowners must seek professional assessments, especially when the damage is extensive or complex.
When to call professionals
If you encounter extensive structural damage, electrical issues, or large-scale water damage, it’s time to contact professional assessors. Additionally, if you’re unsure about the safety of your home or the extent of the damage, seek professional guidance. You should also consult experts when damage involves areas that are difficult to assess independently, such as the roof or the home’s foundation.
Role of professional assessors
Restoration professionals bring a level of expertise and experience that goes beyond the capabilities of most homeowners. They conduct detailed damage assessments using specialized tools and techniques. Their evaluations are thorough, covering aspects of damage not immediately visible.
Professionals also provide invaluable advice on the necessary repairs and restoration work.
Involving professionals in the assessment process ensures that all aspects of storm damage are identified and appropriately addressed. Their expertise not only aids in a more accurate insurance claim process but also contributes to the long-term safety and integrity of your home.
Step 6: Plan repairs and restoration
Once the storm damage assessment is complete, a homeowner’s next step is planning repairs and restoration. This phase requires careful coordination with contractors and insurance companies.
Effective planning and coordination in the repair and restoration phase are key to efficiently restoring your home after storm damage. By working closely with trusted contractors and staying informed about your insurance coverage, you ensure your home is repaired correctly and promptly.
Understanding the repair process
The repair process typically begins with addressing the most critical damages that impact the safety and livability of your home, such as structural repairs, roof damage, and electrical issues. Homeowners should prioritize repairs based on urgency and impact. The focus then turns to cosmetic repairs and replacing damaged items.
Working with contractors
When choosing contractors, opt for licensed, experienced professionals specializing in storm damage restoration. Get multiple quotes, check references, and review contracts thoroughly before work begins. Clear communication about the scope of work, timelines, and costs will lead to a smoother repair process.
Dealing with insurance companies
Provide your insurance company with detailed documentation of the damage and repairs needed. Understand your policy coverage and work closely with the insurance adjuster to ensure all necessary repairs are covered. Keep records of all communications, quotes, and transactions related to the restoration process.
Repair storm damage with Utah Disaster Clean Up & Restoration
Navigating the aftermath of storm damage is a daunting task for any homeowner. Experts in storm damage restoration bring invaluable skills, experience, and resources that ease the burden of recovery.
If you’re facing the challenges of storm damage, remember that you don’t have to go through it alone. Contact Utah Disaster Clean Up & Restoration for expert help. Our team is equipped to handle all aspects of storm damage, from initial assessment to complete restoration. Reach out to us for reliable and professional support in your time of need.